Welcome, DIY enthusiasts and home improvement novices! If you’ve ever stared at a cracked seam or a gap around your windows and wondered how to make it all look seamless, you’re in the right place. Caulking, that magical material that can bridge gaps, keep out moisture, and give your space a polished finish, is our hero today. Whether you’re a seasoned DIYer or just starting out, we’ve got you covered with this comprehensive guide on mastering the art of caulking in Sydney.

Why Caulking Matters
Before we dive into the nitty-gritty of the process, let’s talk about why caulking is an essential skill for any homeowner
- Sealing the Deal: Caulking Sydney is all about sealing gaps and joints, which helps in preventing drafts, water leaks, and even pests from sneaking in.
- Aesthetic Enhancement: A good caulking job can make your home look well-maintained and visually appealing by giving it a seamless finish.
- Energy Efficiency: Properly caulked windows and doors can significantly improve your home’s energy efficiency, helping you save on heating and cooling costs.
- Maintenance Made Easy: Caulking acts as a barrier against moisture, preventing potential damage that can be caused by water seeping into cracks and gaps.
Getting Started
Tools and Materials: Before we roll up our sleeves and get caulking, let’s gather the tools and materials we’ll need
- Caulk Gun: An essential tool for applying caulk evenly and with precision.
- Caulking Compound: Choose the right type of caulk for your project, whether it’s silicone, acrylic, or polyurethane.
- Caulk Remover: Just in case you need to fix mistakes or replace old caulk.
- Painter’s Tape: Helps in creating clean lines and avoiding excess mess.
- Caulking Tool: Used for smoothing and shaping caulk lines.
Step-by-Step Caulking Guide
Now, let’s break down the caulking process into easy-to-follow steps
- Preparation is Key:
- Clean the area you’ll be caulking to ensure proper adhesion.
- Remove any old caulk using a caulk remover.
- Choose the Right Caulk:
- Select the appropriate type of caulk based on the area you’re sealing (e.g., silicone for wet areas, acrylic for interiors).
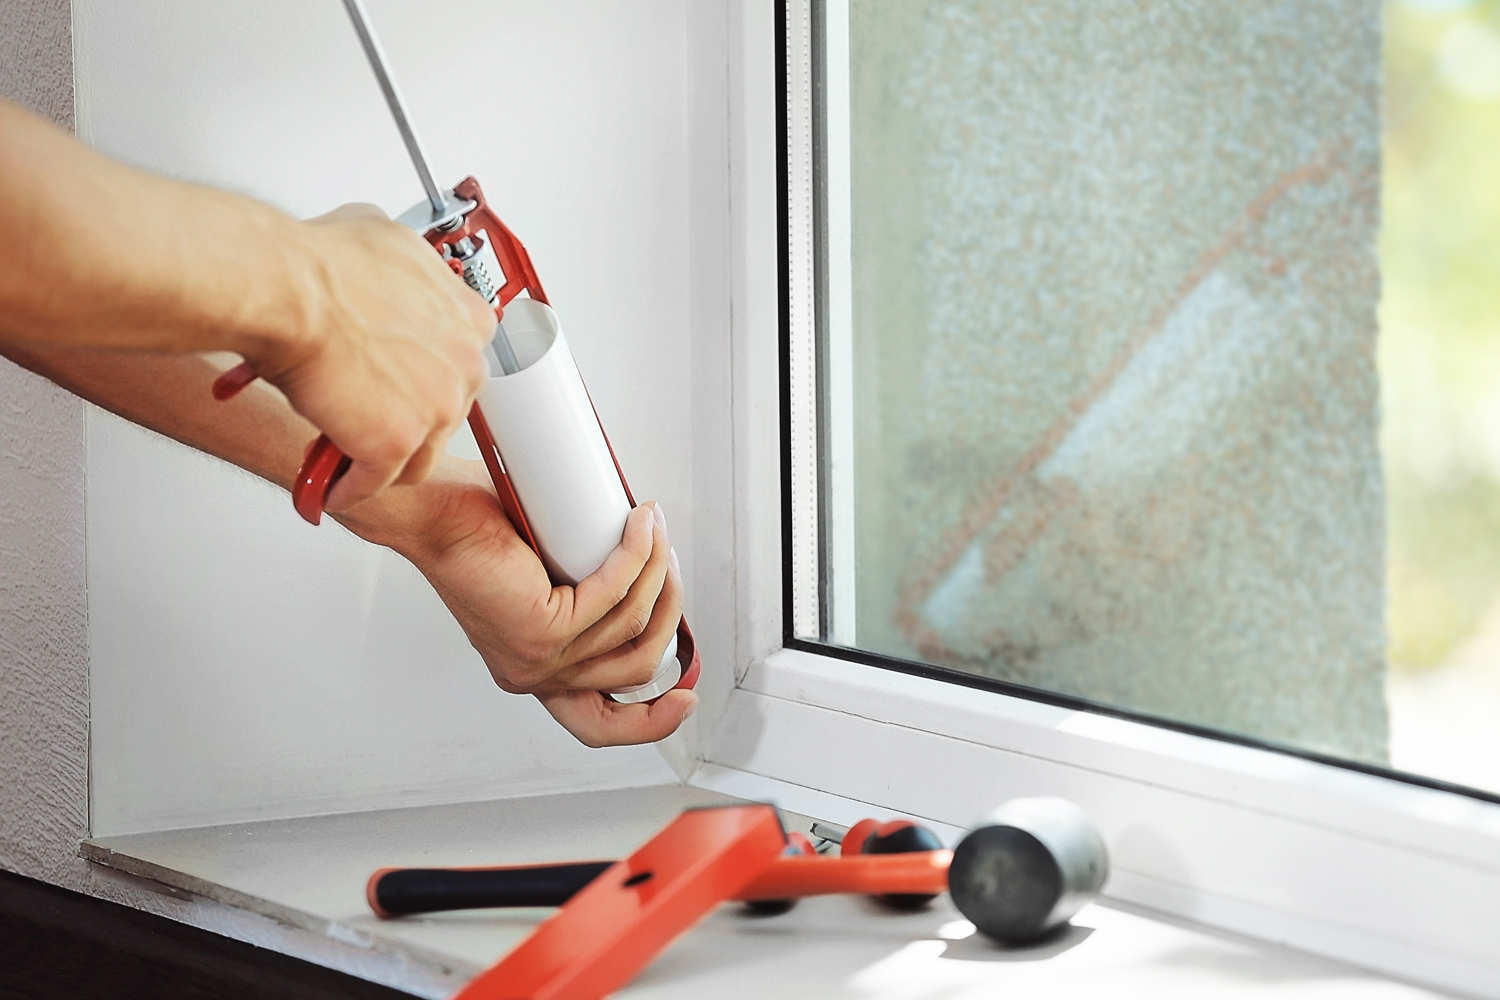
- Cut the Caulk Tube:
- Using a utility knife, cut the tip of the caulk tube at a 45-degree angle. The size of the opening depends on the width of the gap you’re filling.
- Load the Caulk Gun:
- Load the caulk tube into the caulk gun and squeeze the trigger until the caulk is visible at the tip.
- Apply the Caulk:
- Hold the caulk gun at a 45-degree angle and apply a steady bead of caulk along the gap.
- Smooth and Shape:
- Use a caulking tool or your finger (dipped in water) to smooth and shape the caulk line for a neat finish.
- Remove Excess Caulk:
- Immediately remove any excess caulk using a damp cloth or sponge.
- Let it Cure:
- Allow the caulk to cure as per the manufacturer’s instructions before exposing it to moisture.
Conclusion
Congratulations, you’ve just added a valuable skill to your DIY toolbox! Caulking Sydney might seem intimidating at first, but with a little practice, you’ll be caulking like a pro in no time. Remember, the key to a successful caulking job is patience and precision. So go ahead, tackle those gaps, and enjoy the satisfaction of a job well done and a home that’s both beautiful and well-protected. Happy caulking, everyone!